Weather Station Tutorial Part 1: Measuring Air Temperature and Humidity in Arduino with Sensor HDC100x
/
Developing a low cost weather station is an interesting topic. In fact, cost of an assembled weather station is quite expensive, which can be up to €5000. Thanks for the development of an open – source electronic prototype platform Arduino, the sensor system gets into a new generation! A small-scale prototype including six sensors can be created with just only around €200 more or less. Furthermore, the creation of radio module Xbee allows the data transfer through Bluetooth channel, which makes the process of data collecting became easier and more convenient.
The weather station tutorial
In the global tutorial we will explain how to set up a whole weather station system, which separated into multi parts:
Part 1: Working with Air Temperature and Humidity sensor.
Part 2: Working with Air Pressure sensor.
Part 3: Working with Solar radiation / Luminosity sensor.
Part 4: Working with Wind speed / Aenometer sensor.
Part 5: Working with Thermocouples sensor.
Part 6: Working with Soil humidity sensor.
Part 7: Communication between Arduino and RaspPi through Xbee.
Part 1: Working with Air Temperature and Humidity sensor
The sensor implemented to record ambient temperature and humidity in this tutorial is HDC100x from Watterot. It is a four – pin digital sensor. One of the important criteria of this sensor is its sensitivity with direct sun light exposure and rain. Therefore, the material preventing the entering of sun light and positioning of the weather station should be considered. A plastic box was implemented to store this sensor and to avoid the effect of solar radiation, a brown thick paper was applied to cover the top of the weather station box. According EPA (1987), the standard measurement height for temperature and relative humidity sensors is at least 2.0 meters above the ground surface.
Components
Hardware
1x Breadboard
1x Arduino Uno
4x Jumper Wires
1x HC100x sensor
Software
Arduino IDE.
Link: https://www.arduino.cc/en/main/software
Arduino library for HDC100x sensor.
Link: https://github.com/RFgermany/HDC100X_Arduino_Library
Procedure
Hardware hookup
HDC100x is a four-pin sensor, which has the most four important pins needed to be connect:
GND: ground pin, needed to be connect with GND pin on Arduino Uno.
VCC: power pin, needed to be connect with 3.3V pin on Arduino Uno to supply the power for the sensor.
SCL: needed to be connect with A5 on Arduino Uno.
SDA: needed to be connect with A4 on Arduino Uno
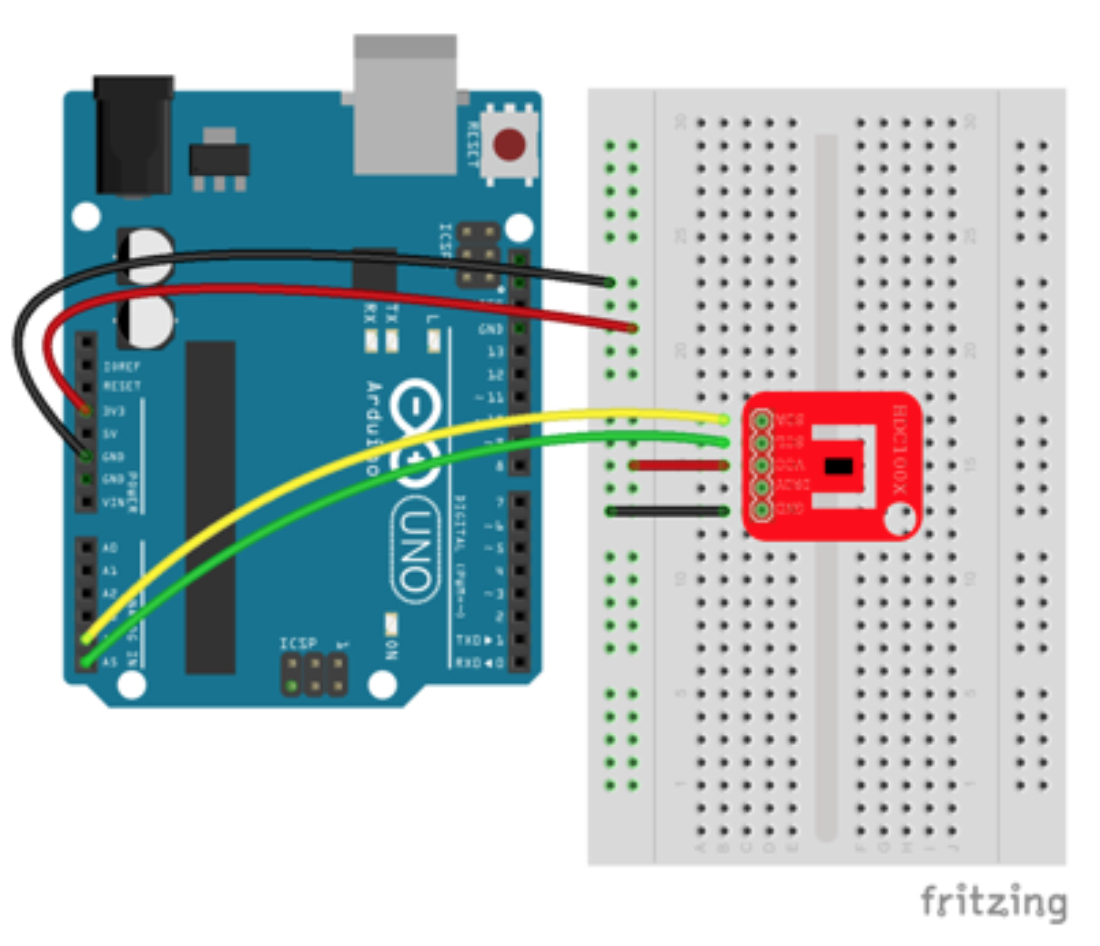
Fig 1. Wiring diagram of HDC100x sensor to Arduino
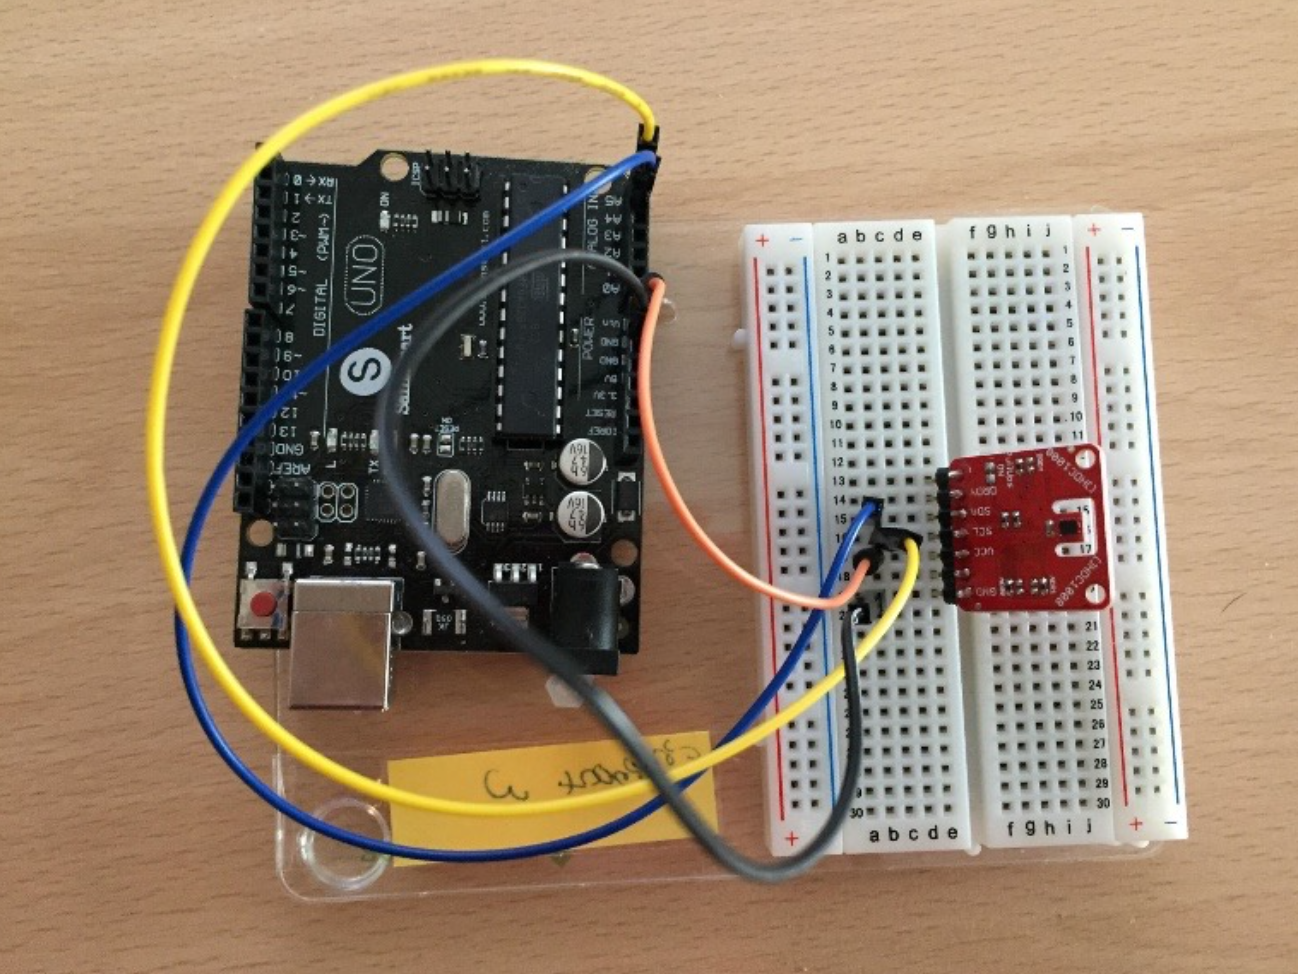
Fig 2. Real work application

Fig 3. HDC100x sensor
Coding
- Connect Arduino to USB port of PC.
- Uncompressed HDC100x library and copy to arduinoidefolders/library

- Launch Arduino IDE
- Open File/Examples/HDC100X/test
- Select Port Arduino: Tools/ Port/ COMx (x: a number)
- Upload the sketch to the Arduino Uno board by clicking this button

- Open Serial Monitor to check the return values: Tools/ Serial Monitor
Results
What we should see.